Sunday, July 26, 2015

Make the best of what you got!


I find creating new work in my own backyard very difficult. It’s a challenge to me and, most of the time, I enjoy the challenge presented. Most of the area around me is cotton fields or some other type of flat farmland. Sometimes it takes a drive around the countryside to find what inspires me, sometimes it’s just a short walk away. Everybody loves going to and photographing famous sights. But those are all over done and hard to get anything original. While it’s nice to get your own view on the most beautiful spots in the world, it’s hard to get a shot that’s going to sell. 

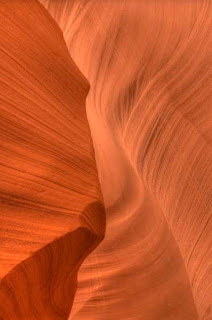
Most recently, I was in the slot canyons taking a very different approach in Lower Antelope Canyon. I was focusing on the walls and various textures when one of the guides asked me if I was going to keep taking photographs of the walls or if I was going to get some of the more iconic shots of the canyon. At first, I was kind of offended. How dare you question my vision! But then I got that I was missing some of the iconic shots that, to be honest, I really didn’t care for. I wanted something original from the slots that nobody else has gotten. (I know, I know, that’s impossible..) I wound up getting my iconic shots and I got some lesser seen shots out of the three slot canyons I visited. I was very happy with the end results.

Back to the point, finding the shots around you and not in the iconic locations is where you show your true colors in photography. It’s not hard to make the super beautiful areas look super beautiful. In fact, if you can’t, you look like a horrible photographer if you can’t accomplish that. But if you can take a mundane environment and make it look surreal, you’ve really done your job as a photographer. Make that your goal. Get out there and make the dull look awesome!

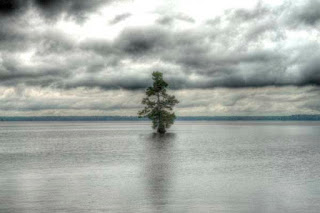
(The above image was taken about an hour away from my house while driving around looking for a subject. Saw this tree by itself out there and pulled over to the side of the road and made this image.)

Tuesday, July 7, 2015

New Website!

Hey all, glad to see you all reading again! I've redesigned the Akerson Studios website and wanted to let everybody know! Due to the fact my last website was designed with Adobe Flash, it was very limited and unable to be viewed on many types of mobile devices. The new page has layouts for both desktop/laptop performance and also mobile platforms not utilizing Adobe Flash. I decided to go with WordPress after a little coaxing from a friend of mine. I used the Photocrati (http://www.photocrati.com) templates. They provide a ton of different templates to allow for total customization. They also build eCommerce into the templates to allow for print sales via PayPal. I can say that this a top of the class system to run a photography website. We've also added a Facebook page to help keep everybody up to date. As of now the slot canyon photographs are live on the website with the rest of my photography galleries to be updated in the coming weeks when I return home from California. Thanks again for visiting and please view our new website!

Akerson Studios Website

Akerson Studios Facebook Page

Thursday, July 2, 2015

Photography Tips for Upper and Lower Antelope Canyon


Photographing the slot canyons of Arizona has been a bucket list event for me for a long time. Finally getting the opportunity to, I jumped at the chance. After doing a considerable amount of research on the Page area, tour guides and shooting in the canyons, I made my reservations with Adventurous Antelope Canyon Photo Tours (http://www.NavajoAntelopeCanyon.com). I did make the mistake of not booking a hotel prior to arriving in Page, and I highly suggest you do not make my mistake yourself. Staying in Page is not cheap, with rooms in the summer starting around $115/night on the cheap end.

(Upper Antelope Canyon)

Once I arrived in Page, I wandered around the local area taking a good deal of desert photographs. Near Page is the famous Horseshoe Bend which is a wonderful place to shoot at sunrise or sunset. It’s a 3/4 mile hike into the overlook that is seemingly up hill both ways. If you are afraid of heights, this definitely isn’t the place for you. But if you’re willing to forego that, it’s a wonderful view. The best shots are made right up against the edge of the cliff that has no guard rail or anything protecting you from the 1000’ drop off. It is a view that is worth the hike and heat for.

(Horseshoe Bend)


A day before my Upper Antelope tours were to happen, I got a last minute photographers tour in to Lower Antelope with Ken’s Tours. Entering the canyon is not for the faint of heart. It’s a super steep stairway down about 80 or so feet into the canyon. There was a seemingly unending line in front of us and behind us entering the canyon. Letting people pass us so that we could find a lull in traffic to photograph with tripods was aggravating but something that just has to be dealt with. Due to the fact there were so many people down there, our guides wound up giving us an extra half hour in the canyon to get the shots we really wanted.

(Lower Antelope Canyon)

Lower Antelope Canyon really requires a wide angle lens. I felt like I was missing a lot of good shots with my Nikkor 24-70mm f/2.8. I was really wishing I had a little more room to work with. That said, I was pretty happy with the images that came out of it. Due to the fact that the canyon is wide open at the top we had a lot of sunlight coming in but also had very dark shadows and in order to accomplish good shots I needed to bracket and merge my images into HDR with Photomatix. I shot in aperture priority and set it at f/8. That gave me pretty good focus all the way around while maintaining sharpness. After a lot of post production, I got some great images out of Lower Antelope.


(Rattlesnake Canyon)

Upper Antelope Canyon was absolutely stunning. Given that I went during the summer months they were focused on getting us the light shafts and not much else. To be honest, there are so many people in the canyon, it’s hard to get anything else. My first tour took us to Rattle Snake Canyon first, which was probably my favorite canyon out of the three I toured. I definitely recommend it. There were a total of five of us in the canyon to photograph. After Rattlesnake, we went into Upper Antelope and got all the iconic shots. It seemed so easy and we had all the time in the world to nail the shot. Exactly the opposite of what I read it would be like. Our tour guide, Roman, was on his game and we got it all. If you brought a wide angle lens, prepare to spend your tour sitting down and being at the lowest position while the people who brought longer lenses will be in the back standing up.


(Upper Antelope Canyon)

I also booked a second day in case I couldn’t get the shots I wanted because of how busy it was. Day two was everything you read about online about get your shot and get out and the very limited time. It was way overpacked and while Roman (Had him again) did his very best, but it was just way too crazy. While we did have a good amount of time, people who didn’t know their cameras well suffered in the high paced environment that was produced that day. Know you’re camera! It can be the difference between getting the shot and walking away unhappy. On another note, my Nikkor 24-70mm f/2.8 was very useful inside Upper Antelope as compared to needing a wider lens in Lower Antelope.

So here are my photo tips:

*BOOK THE PHOTO TOUR! Don’t try and do it on a walking tour!! Most - if not all - will not allow a tripod unless you’re on a photo tour. Book it WELL IN ADVANCE if you want a shot at one. I overheard more than one person saying they got in on a cancellation and that the next available photo tour wasn't available for months. Photo tours get priority in the canyons so make sure you book it months in advance.

*Bring your tripod. In many cases, they check that you have a DSLR and a tripod before even setting out on the photo tours.

*Use aperture priority and set it to f/8 or f/11.

*Use a low ISO (100-400) and take advantage of that tripod.

*Shoot RAW if you can! If you’re shooting in JPEG, set your white balance to ‘Cloudy’ to get the right colors inside the    canyons.

*Bracket images! Especially in Lower Antelope with its highlights and shadows. In upper, you can get some interesting HDR images.

*Know how to effectively use your tripod and be able to manipulate it quickly.

*Know your camera’s settings inside and out. It can be the difference between getting an image or walking away unhappy.

*Bring extra batteries. Lots of long exposures will drain your battery quickly.

*Bring a remote shutter release!! That’ll make sure you get sharp images.

*Bring a blower or canned air and use it often. Sand is constantly being thrown into the air to light up the light shafts - it will end up on your lens and camera. Use it constantly.

*Look around! While you’re waiting for that light shaft, look up. Look left. Look right. Look behind you. There are so many shots to be had it’s ridiculous. I got so many great shots while waiting for others while the rest of the group was focused on waiting for “the” shot.

*In Upper Antelope, when they’re tossing the sand up in the air, wait for the sand to settle (After a few shovel fulls of sand they toss) and create a nice dusty light shaft. If you shoot right after they toss it, the highlights will definitely blow out.

*Leave your camera attached to your tripod and carry it while it’s mounted to it. Remember to close your tripod legs and move on to the next shot.

*Use your viewfinder and images to verify nobody is in your shot. It’s not hard to catch somebody in your shot as the canyons are very crowded. Let your tour guide know and he/she will make sure people move out. 

*DO NOT try and change your lens in the canyon. The sand and dust flying around WILL get into your camera for sure.

*Leave your bag in the tour vehicle. It’s too tight in there to use it. I found the first time that I did bring it the only thing it was used for was carrying my water.

*Bring water! It’s hot out there! While it’s cooler in the canyons, it’s still rather warm.

Last but not least: 

*TIP YOUR TOUR GUIDE! If they went out of their way to get you your shot, make sure you show them some love. Most of these guys and gals can tell you what settings to use and even help you with the composure of your shot. In some instances I even saw guides taking the photos for the customer themselves so that they walked away with a great image.
Thursday, March 6, 2014

After a number of years removed of doing photography, I have decided to pick up the camera once again. Photography has changed vastly in the past few years and it's pretty amazing. The process of editing has gotten much more push-button and less labor intensive. Creating my panoramic images takes just as much time but everything else has seemingly gone streamline. I jumped back in with a Nikon D610 and absolutely love it. I decided to take the "normal" (50mm) route to get my footing again but will soon be picking up a Nikon Nikkor 24mm PC-E N lens soon enough. After spending a lot of time in large format photography I have learned to enjoy the simplicity of prime lenses and their sharpness. Add in to the fact that the lack of pin cousin and other degrading factors of zooms I have decided it would be better to stick to primes. I plan to purchase a number of lenses, including some form of zoom for ease of use, but intend to stick to prime lenses as I feel that it forces me to think harder about making a photograph than ripping shots off with zooms at various focal lengths. I recently updated my website and have been going through the archives to find work to add that I haven't before. That has been a wonderful experience, enjoying images that I had once written off. I also have started up taking some of the images, and new ones, adding them to my iStock gallery. I used to be very against microstock but now see it's value in bringing in extra money with work I already have. I have a few trips in the near future planned, so keep visiting my website to see the new work!

Sunday, August 23, 2009

Media Lab's SiteGrinder

Welcome back. Once again, it's been some time since I've wrote in my blog and I've found a worthy cause. MediaLab's SiteGrinder Pro. For those of us that love photography AND want custom website but don't want to pay others to do it, we have to learn Adobe's Dreamweaver and sometimes - depending on how fancy you want to get - Adobe Flash. Those are both wonderful and powerful software suites, but pretty complicated. I have pondered the thought of how hard it would be to do more web design in Adobe Photoshop but gave up for a while. Then I was reading a copy of Layers Magazine that my Aunt Karen had given me and I saw an ad for SiteGrinder 2 Pro.

I downloaded the demo and played with it extensively. Wow, what a wonderful piece of software! You completely design your layout in Photoshop and tell SiteGrinder (A Plug-In) what you want various links and other options to do, click a button and it outputs everything to proper HTML and CSS code. Amazing! As some of you may know, I am the webmaster for the International Association of Panoramic Photographers. I have been looking for ways to get away from PHP and into a more design-oriented program to design the site. After using this, I have decided to purchase SiteGrinder 2 Pro and run with it. I will be rolling out a new site for IAPP here in the next month or so and hope it'll be better than the last. I think that it'll be a lot better to start from scratch, relatively, and roll with it.

After that I will be re-designing my website. While SiteGrinder 2 Pro doesn't have all the capabilities of Adobe Dreamweaver, it does have quite a selection. From drop down windows to image galleries, it is something that I think every photographer who uses Adobe Photoshop and designs their own website should take a look at. Is it expensive? Yes, the pro version is around $350. Does it make my life a whole lot easier? Yes, very much so. You can insert HTML snipetts, Adobe Flash elements, PHP elements and much more.

So, when I do get the new IAPP website rolling, I will definitely share it with you and look for your comments and suggestions. Speaking of IAPP, we're almost sold out on our Albuquerque, NM Photo Safari at the International Balloon Fiesta. That should be a wonderful event. I will not be in attendence this time, but will, more than likely, be at the international convention next year. Also, IAPP has opened their 2009 annual photo competition. There will be cash prizes along with a GigaPan Epic 100 and a copy of PTGui Pro awarded to the winners. If you do the panoramic thing, be sure to enter your best images! I wish you the best of luck!

Anyway, until we meet again, make some more photos and enjoy your time doing so!

Wednesday, June 3, 2009

GigaPan - Part II.V

Well, after using the Nikon P6000 on my trip to Willamsburg and Jamestown I decided that it was not up to part. The GPS feature didn't work as well as desired and many other minor things that made the Canon G10 more worthwhile. So, from this point forward, all images that I post to here or GigaPan.org (Search: akerson - and you'll find my images).

After playing around with the Canon G10, I've found it to be quite a nice camera. It seems a better build than the Nikon P6000 and it has more optical zoom. That allows me to make an even larger image due to the fact it'll have to take more images to create the panorama or mosaic. The image quality seems a bit better, too. One major feature that I'm impressed with is it's ability

Anyways, just for the record, all images from this point forward will be with the Canon G10. I use a Promaster (AKA Repackaged Delkin) 16GB memory card, the GigaPan Epic 100 and a Gitzo tripod and head.

Tuesday, June 2, 2009

GigaPan - Part II

Well, I am finding that I love this Epic 100. I am really looking forward to GigaPan's release of their DSLR version. I think it'll be really nice to be able to use my Nikon camera and whatever lens I prefer.

That said, I had a pretty good time in Williamsburg and Jamestown Virginia with the Epic 100. Unfortunately a couple of panos were ruined due to the fact I knocked the calibration out of whack and didn't notice it. Operator error. Aside from that, my biggest issue was other tourists either just walking right in front of the camera (While looking at it, none the less) or tourists asking me what the heck that contraption was and what I was doing with it. I don't mind explaining what I'm doing and how the GigaPan works though. I enjoy promoting panoramic photography and all the tools that are out there. It's also great for someone to come up and say they've read all about it and were really excited to see it.

Anyways, here are a few images I took while out in Jamestown and Williamsburg. They're not wonderful, but I like a couple of them. Remember to check out Panorama - The Journal of Panoramic Imaging for my full review of the GigaPan Epic 100. Also, be sure to enter some images into the International Association of Panoramic Photographers 5th annual photo contest. (http://www.PanPhoto.com)